Saving timelines
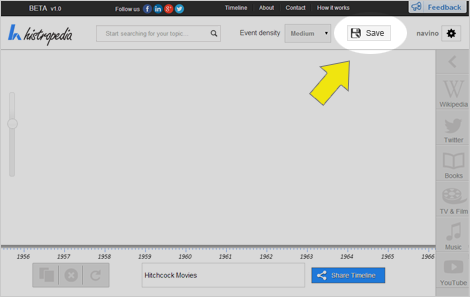
The save button is located on the white header bar as shown in the screenshot below:
Click on the save button to show a drop down menu with the two save options.
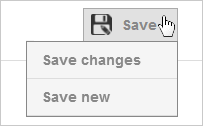
Save options
The following save options are available:
Save new
Use this option to:
- save a timeline you've just made, or
- save a copy of an existing timeline
Save Changes
Use this option to:
- update a timeline that you've created.
There is currently no way to go back to a previous version of a timeline, so be very careful when saving changes!
Note: The 'save changes' option is only active if one of your own timelines are loaded - it will be greyed out if you are making a new timeline or have a timeline loaded that was made by another user.
Naming your timeline
After selecting either saving option, you will be prompted to give the timeline name.
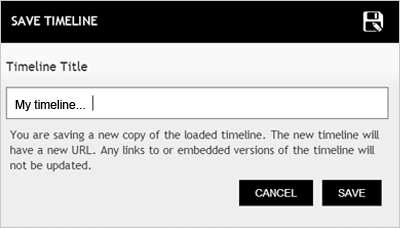
If you are saving changes to a timeline, the previous name will be present in the text input box. You can change this if you would like to rename the timeline as part of the edit.
After naming the timeline, click on 'save' to finish. You can select cancel at any time to abort the save.
Accessing your saved timelines
Every timeline you save will be stored in the 'My Timelines' section of your account.
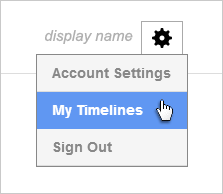
When you're signed in, you can find all of your saved timelines by clicking on the
 symbol next to your display name, then selecting 'My Timelines' from the drop down menu.